Saturday, July 30, 2011

Figs

It is FIG TIME again. Dad and Steve were out Saturday morning picking figs. I think I might have the largest fig tree in Cabarrus County. If you would like to help me pick them, or hold Camilla while I am picking them, you get to keep half for your own recipes.  I could definitely use the help.

I recently had the pleasure, no the honor, of visiting Ocracoke, NC. If you have never been to Ocracoke it is time you discover a hidden, literally hidden jewel. Isolated by a 2 hour ferry on the Outer Banks of North Carolina, Ocracoke has a history of being self sufficient and unique. Did you know that North Carolina even has a dialect know as Brogue which is also found in Irish dialects of English? Well, it is on Ocracoke and unfortunately it is dieing on Ocracoke.

On of the most fascinating things I discovered on Ocracoke is their native Fig Trees. I am the gardening nerd who also has a Fig Tree and was excited to talk to locals about which recipes they prefer for preserves and cakes. All of the locals kept mentioning a Ms. Ruth's Fig Cake. So, I share with you....

"On Ocracoke it's a small step from routine to extraordinary," Ruth Fordon
Fig Cake Recipe
3 large eggs
1 1/2  cup sugar
1 cup vegetable oil
2 cups flour
1 tsp. salt
1 tsp. baking soda
1 tsp. cinnamon
1 tsp. ground allspice
1 tsp. nutmeg
1/2 cup buttermilk
1 tsp. vanilla extract
1 cup walnuts coarsely chopped
2 cups preserved figs cut up

Grease and flour one large tube or bundt pan.
Preheat oven to 350.

In a medium mixing bowl, beat eggs until light and foamy. Add sugar and beat until pale, add oil slowly and beat another minute. Sift together flour, spices, salt and soda. Add to eggs alternately with buttermilk, beating well after each addition. Stir in figs, nuts and vanilla. Pour into prepared pan and place in preheated oven. Bake for 45 minutes or until cake tests are done with a toothpick. Cool in pan for 20 minutes then invert onto a rack and cool completely. Transfer to a serving plate and enjoy.

Bree's Fig Preserves
For each pound of fresh figs, add 1/2 cup of sugar and lemon juice.
For example:  7-8 jelly jars
6 pounds of figs
3 cups of sugar
1/2 cup of lemon juice.

Cut stems off figs and cut in half.
Boil the mixture down for about 35 - 40 minutes.
Ladle into sterilized jars and process in a water bath canner for 35 minutes.

Here are some beautiful images from my week at Ocracoke:
The view from the top of the Life Saving Station at Portsmouth, NC.
As we were touring the ghost town of Portsmouth we walked into the church to hear live organ music being played by our group leader Diane. What a surreal moment!!
Sailing on the Windfall through the Pamlico Sound.

The view from NCCAT looking out over the harbor at Ocracoke.
Sunset at Ocracoke

Before and After Pictures

I was out of town last week. Although I had a wonderful time, I always hate getting behind. This is what the kitchen looked like Saturday morning after I went and got everything out of the garden from this past week:

Then, by Saturday night it looked like this:
Inventory:
6 jars of pickled Okra
12 jars of Fig Preserves
1 Fig Cobbler
1 batch of Rachel Ray's Squash-A-Mole
2 Grilled Vegetable Lasagnas (1 for next week and 1 to put in the freezer until October)
and enough grilled vegetables for pizza tonight for the family


Sunday, July 24, 2011

Why cook the extra amounts??? Bree preaches a little.....

The Suburban Challenge, for any new readers, is living up to and owning the idea of being a domestic diva while not being a stay-at-home diva. It is the handbook for all of us multi-taskers who want it all - career and domestic bliss.

The key to The Suburban Challenge, if you choose to accept it, is cooking in bulk. You must be willing to cook one time per week and get in 4-7 meals from your time in the kitchen. Rachel Ray preaches this, but cooks a lot of different entrees on one day using similar ingredients. I preach this by cooking the same entree times 4 or 7 and preserving it properly.

In either case, you are providing a healthy, home cooked, fresh meal for your family every night of the week while also saving one hour of each day by not having to cook it. With that extra hour you are able to achieve domestic diva status by gardening, working-out, running errands, sewing, playing outside with the kids, crafting, ... whatever your heart's desire.  People ask me all the time - "Bree how do you do it all?" Well, time management. Make the most of your cooking time on Sunday, then spend the rest of the week WITH THE TV OFF getting done what it is you seek to achieve.  Peace!

Saturday, July 23, 2011

White Chili Starter

This is a great recipe to freeze or can. Imagine using this starter to cook a batch of white bean chicken chili on a cold Sunday afternoon watching the NFL playoffs - if there are NFL playoffs..... And to think, the tomatoes, peppers, and maybe even the beans came from your own garden!

6 cups of cooked beans (This year in the garden I grew a white bean that is no longer sold which my grandmother passed along to me. It is a cross between a Crowder Pea and a Pinto Bean.)
1/4 cup olive oil
2 tablespoons minced garlic
3 yellow onions
3 chopped bell peppers (mixed in colors)
3 jalapenos (or other hot pepper from your garden)
2 tablespoons chili powder
1 tablespoon cumin
3 tablespoons fresh chopped basil
6 cups of peeled, seeded and chopped tomatoes
2 tablespoons salt
1 tablespoons black pepper
6 cups water

Makes 5 quarts
The longest part of the prep is the tomatoes.  It took me one hour to peel, seed, and chop the six cups. After that, the starter came together fast.

1. Heat the olive oil and garlic over medium heat.  Add the onion and cook until soft - about 5 minutes.
2. Stir in peppers and cook for 2 more minutes.
3. Stir in spices and cook for 1 more minute.
4. Stir in tomatoes and beans. Cover with water (about 6 cups) and bring to a boil. Reduce the heat and simmer for 10 minutes.
5. Package and freeze or Ladle starter into prepared canning jars. Process in a pressure canner at 11 lbs. for 90 minutes.


*When ready to serve. Cook 2 chicken breast then shred them. Add chicken to one jar of starter, heat and serve. Serves four. If you need to serve a crowd, add another chicken breast and another can of beans to bulk up the starter to serve six.

Wednesday, July 20, 2011

Cuccumber Bread

A follow up to last weekend's blog about the Cucumber Bread recipe.  I didn't really care for it because there were bitter bites (from too much baking soda or cooking the cucumbers with their peels on?). However, it did inspire me to bake a cucumber.  I came up with two recipes for you:

Cucumber Bread/Muffins - this recipe is adapted from a Paula Dean recipe so IT IS NOT HEALTHY! This is a good recipe to prepare for a housewarming, hostess, new baby, etc....
3 cups of flour
1 1/2 teaspoons salt
2 teaspoons baking soda
3 cups sugar
2 teaspoons cinnamon
1 cup vegetable oil
4 eggs beaten
2 cups of cucumber (about 3 medium cuc.s)
1 teaspoon almond extract

1. Prepare two loaf pans or muffin pans.
2. Preheat the oven to 350 degrees
3. Peel strips off of the cucumber, leaving some to give the cucumber strength in the food processor but getting rid of some of the bitter skins.  Slice longways into fourths so that you can cut the seeds out easily. Then grate in a food processor.

4. Combine the flour, salt, baking soda, sugar, and cinnamon in a bowl.
5. In a separate bowl combine the oil, eggs, almond extract, and cucumber.
6. Incorporate the dry ingredients into the wet ingredients.
7. Bake loaf pans for one hour or muffin pans for 30-35 minutes.

Cucumber Carrot Breakfast Muffin: The sinfulness of that last recipe encouraged me to come up with something I could actually keep around the house and eat.
1 cup cucumber, peeled in strips, seeded and grated (see  recipe and photo above)
1 cup grated carrot
1/2 cup applesauce
2 tablespoons honey
1/2 cup brown sugar
1 egg
1/2 cup raisins (optional)
1 cup flour
1 cup old fashion oats
1 tablespoon flaxseed
1 tablespoon wheat germ
1 teaspoon baking powder
1/2 teaspoon baking soda
1 teaspoon allspice

1.Combine the cucumber, carrot, applesauce, honey, brown sugar, egg and raisins in a bowl.
2. In a separate bowl combine the flour, oats, flaxseed, wheat germ, baking powder, baking soda, and allspice.
3. Slowly incorporate the two bowls together.
4. Spoon into a greased muffin pan.
5. Bake at 400 degrees for 25 minutes.

Sunday, July 17, 2011

A Weekend on The Suburban Farm

Weekends are work!!  Especially when there is a garden involved.  Knowing that Steve and I had a lot to do in the garden this weekend, we took advantage of the cooler temperatures on Friday evening to get started.  Once we put Cam down to bed, we then mowed, "weed eated", and weeded the garden to get a head start.

Saturday, we took turns plowing and raking up grass to prepare two rows for the soon to come fall garden. Steve would work a little while I stayed inside with the baby and then we would take turns. We started where the spring garden was (potatoes and broccoli) and got two rows ready for sweet potatoes.

You can see the space ready for sweet potatoes in front of the okra which is still providing a lot of produce and green beans climbing on a fence. The green beans are almost done.

While I was inside, I also had the front carrier on so Cam could help me can some Tomato Basil Simmer Sauce. This recipe came from Better Homes and Garden and works great with the Summer Meatballs recipe from June 8th, 2011. 
Tomato Basil Simmer Sauce: http://www.bhg.com/recipe/canning/tomato-basil-simmer-sauce/

I was able to get 7 pts canned and the garden prepared for sweet potatoes all before 12:30 (with Steve's help of course).  Then it was off for family time and  The Band of Oz.
Sunday I had to wear another hat and work at my third job (WS) where I was inspired by Kale!!  We made deep fried Kale.  So, next weekend I will start clearing the space where the corn was in the garden for fall broccoli, spinach, and KALE!
After work I tried a new recipe for Cucumber Bread that was in the Salisbury Post.  I am not impressed.  But, I have some ideas on how to make it better. Once I develop it, I'll share with you!

IF YOU LIVE IN NORTH CAROLINA, YOU MUST PLANT SWEET POTATOES!
HERE'S WHY:
1. North Carolina actually has a Sweet Potato Commission: http://www.ncsweetpotatoes.com/
2. North Carolina is the leader in sweet potato production, supplying 40% of the annual US production of sweet potatoes.
3.  This food is low in Sodium, and very low in Saturated Fat and Cholesterol. It is also a good source of Dietary Fiber, Vitamin B6 and Potassium, and a very good source of Vitamin A, Vitamin C and Manganese.
4. It is easy to grow. Plant, make room for the vines to spread, and then harvest in the fall.
5. Sweet Potato Biscuits, Sweet Potato Pie, Sweet Potato Fries, Baked Sweet Potatoes, need I say more??

Thursday, July 14, 2011

Okra and Tomatoes

Freeze it or Can it!! The easiest canning meal yet!

1 qt sliced okra
4 tomatoes, chopped
1 onion diced
1 green bell pepper diced
1 clove garlic, minced
1 tsp basil
1 tsp thyme
cayenne pepper to taste
2 tsp salt

Saute onion and garlic in a little olive oil.  Add green pepper, and cook 3-4 minutes.  All all the other ingredients.  Cook till soft, about 10 minutes.
Freeze or Can.
For canning: process in a pressure canner at 11 lbs for 30 minutes for pints and 35 minutes for quarts.

Last night, after we put Cam to sleep, Steve and I were able to can a double batch of Okra and Tomatoes and make a large batch of Yellow Squash/Sweet Potato Baby Food in 2.5 hours - GO TEAM!

Okra and Tomatoes for Dinner: Steve and I ate this a lot this past year heated over rice. But to make it an even grander meal, serve with some smoked sausage or chorizo and you will have yourself a southern/Cajun delicacy.

Monday, July 11, 2011

Provencal Simmer Sauce

Here is another canning recipe that combines the wonderful flavors of Ratatouille in a ready to serve sauce all year long!

8-10 cups peeled, seeded and chopped tomatoes
2 medium eggplant, cut into 1/2 cubes
5 bell peppers, mixed colors, also chopped into 1/2 cubes
4 medium zucchini cut into 1/2 inch cubes
2 onions diced
1/2 cut fresh chopped basil
1 tablespoon fresh oregano chopped
2 tablespoons fresh thyme chopped
4 tablespoons plus 3 tablespoons olive oil separated
1/2 cup balsamic vinegar
1/2 cup red wine vinegar
1/2 cup pickling salt


1. Prepare tomatoes
2. Blanch peppers (boil for 30 seconds then immerse into ice water). This helps to breakdown the coarse pepper skins for the recipe.
3. Prepare canning jars.
4. In a large (7 qt) saucepan, heat the 4 tablespoons olive oil over medium high heat. Add the onions and cook until golden, about 8 minutes.
5. Add zucchini and saute for 5 minutes stirring often.
6. Toss the remaining 3 tablespoons olive oil with the eggplant making sure to coat it well. You want the eggplant to absorb the oil.  Add to the zucchini along with the salt. Stir well, cover and reduce heat to medium cooking for 5 minutes.
7. Add bell peppers and tomatoes and cook for another 2 minutes.
8. Add both vinegars and bring to a boil.
9. Stir in chopped herbs, reduce heat and simmer 20 minutes.
10. Ladle sauce into sterilized jars with one inch of head space.
11. Process in a pressure canner at 11 pounds 45 minutes for pints and 50 minutes for quarts.


Provencal Chicken using the Provencal Simmer Sauce:
1. Heat 1 tablespoon olive oil and 1/8 teaspoon minced garlic in a 2 qt sauce pan over medium high heat.
2. Add sliced chicken breast strips and brown on both sides about 2 minutes each side.
3. Add Provencal sauce (about 1/4 cup per chicken breast).
4. Reduce heat to medium low and simmer for 15 minutes.
5. Serve over Couscous or egg noodles.

Sunday, July 10, 2011

Chicken Pot Pie Starter

The problem I have with canning is that I cannot feed my family all year with pickles, relish, and jams.  I love to can these items, but The Suburban Challenge needs to prepare for another year of cooking meals in little time. Therefore, I created a canning recipe for Chicken Pot Pie Starter.  I was able to preserve vegetables from the garden and have also managed to cut the preparation time for dinner down to about 10 minutes. (You will need a pressure canner.)

Makes 7 qt (That's 7 meals for later in the year!!)
10 cups of snapped and cut green beans
10 cobs of corn, corn cut from the cob
5 cups white potatoes, pealed and chopped
2 lbs (about 3 lg breast) chicken breast, boiled and shredded

(*You may use other vegetables to substitute for some of the corn or green beans if you don't have enough and have squash, zucchini, onions, or celery available. The cooking times will remain the same.)

1. Boil the chicken. Reserve the cooking liquid. This broth is good flavor to use when hot packing the jars.
2. Prepare your jars for canning.
3. Evenly distribute shredded chicken into your sterilized jars.
4. Bring a large pot of water to boil.You will be boiling one vegetable at a time since their cooking times vary. This will also allow you to even distribute the vegetables in each jar. Start with the corn. Boil 5 minutes then pack into jars. Boil green beans 4 minutes. Boil potatoes 3 minutes. If using zucchini, squash, onions, or celery, also boil each for 3 minutes and distribute into jars. Bang jars lightly onto counter to allow vegetables to settle. To remove vegetables from the boiling water without dumping the water each time use a small sieve, a small colander, or a slotted spoon to remove.
5. Add 1 teaspoon of canning salt to each jar.
6. Boil reserved chicken stock. Add to each jar leaving 1 1/2  inch head space. If you don't have enough stock use boiling water to fill.
7. Prepare the Pressure Canner.
8. Process at 11 pounds for 90 minutes.


To Make the Chicken Pot Pies:
1 tablespoon flour
10.5 oz can Cream of Chicken Soup
10. 5 oz can Cream of Celery Soup
1/4 teaspoon salt
1/8 teaspoon pepper
can of 12 Oven Ready Buttermilk Biscuits
2 tablespoons melted butter

1. Drain the vegetables reserving the liquid in the jar. Return the liquid to the jar and add flour. With the top on, shake the jar mixing the liquid and flour. Return liquid to the vegetables.
2. Mix in soups, salt, and pepper. Pour mixture into a greased 9 x 13 pan. Top dish with 12 biscuits. With a pastry brush, brush the tops of all biscuits with melted butter.
3. Cook at 350 degrees for 50 minutes, or until biscuits are golden and mixture is bubbling around them. Allow 5 minutes for the casserole to set before serving.

Saturday, July 9, 2011

Food Processor Pizza Dough

This is a great way to use up left-overs in the fridge or vegetables from the garden. Last night, Steve and I had a pizza with homemade pesto (frozen at the end of last season), roasted zucchini and tomatoes from the garden, and some fresh mozzarella left over from the beach.

This food processor recipe comes from a free handout I received at Williams Sonoma about two years ago. It is easy and makes two doughs.  Steve and I will probably eat the other one tonight. Enjoy!

1 tablespoon active dry yeast
1 teaspoon sugar
1 cup warm water
3 cups all purpose flour
1 teaspoon salt
1 tablespoons olive oil

In a small bowl, dissolve the yeast and sugar in the warm water and let stand until foamy, about 5 minutes.

In the bowl of a food processor fitted with the dough blade, combine the flour and salt and process with 3 or 4 pulses. With the motor running on the dough speed, slowly add the yeast mixture, allowing each addition to be absorbed before adding more. Continue processing until the dough forms a ball and cleans the sides of the bowl, about 1 minutes, then process for 1 minute more.

Coat the inside of a large bowl with the olive oil and place the dough in the bowl. Cover with a clean kitchen towel and let the dough rise in a warm place until doubled in size, about 1 1/2 hours. Divide the dough in half and roll out as directed in your pizza recipe. Makes two 12-inch rounds.

Prepare pizza making sure to precook any meat or vegetable toppings.  Cook at 400 degrees for 15-20 minutes.

Tuesday, July 5, 2011

A Garden Hoe-In!

Checking in on your garden progress  :)

Challenges Facing Preserving ALL the Harvesting!
I have made just about every Squash and Zucchini recipe I can get my hands on, and I still have it coming out of my ears.  Rachael Ray's August Every Day magazine has a lot of mouth watering recipes that I am also going to try - like Squash - a - mole. But I still want to preserve some of it for when my tomatoes and eggplant are ready. (Why can't they all get on the same schedule? Who didn't get the memo that I wanted to make Ratatouille?)

Well, I am trying something new this year.  I am blanching it (boiling for thirty seconds and then submersing into ice water) before freezing it. Hopefully this will allow me to thaw some semi-fresh and semi-raw vegetables for recipes later in the year.  My thinking is that freezing raw vegetables will not work as well because both squash and zucchini tend to sweat a little when they are cut into. By blanching them, I stop the sweating process before they go to the freezer. 

Now the big question I had was how to cut them. If I wanted to use them for lasagna or the grill, flat circles are best. But, if I want chunks for ratatouille or zucchini bread, spears are best. So, as an experiment, I cut some both ways and placed them all into a bag together.  

The mistake I may have made (only time will answer) was that I placed them into the bag together to freeze. A friend suggested that I should have frozen them on a cookie sheet first and then placed them into a bag together. This is how you should freeze fruit - so maybe I should have done my veggies the same way. We shall see.

The big point is: I no longer feel pressured to use up my produce before it goes bad. I have just bought myself about another three months to cook it up.  This process should work with any abundance you have hawking at you from the kitchen counter, screaming as it starts to go bad....All that hard work...All that hard work...Don't lose me....

Time to Plant!
Time to plant Pumpkins, Butternut Squash, Acorn Squash, and Spaghetti Squash. This is my favorite food group and one of the reasons I love fall cooking - the sweet starch group. (Sweet Potatoes fall into this group but wait about two to three more weeks before starting those.) Most of these plants start from seeds so they will need longer to germinate. So, if October is the date you are seeking - plant now! I planted mine about a month ago so they will be ready in September.
All of these plants are vine growers so they will need are large area to spread. Work while they are young to keep the grass away - you will appreciate this once the vines go wild in September.

Monday, July 4, 2011

Reaching Goal # 3

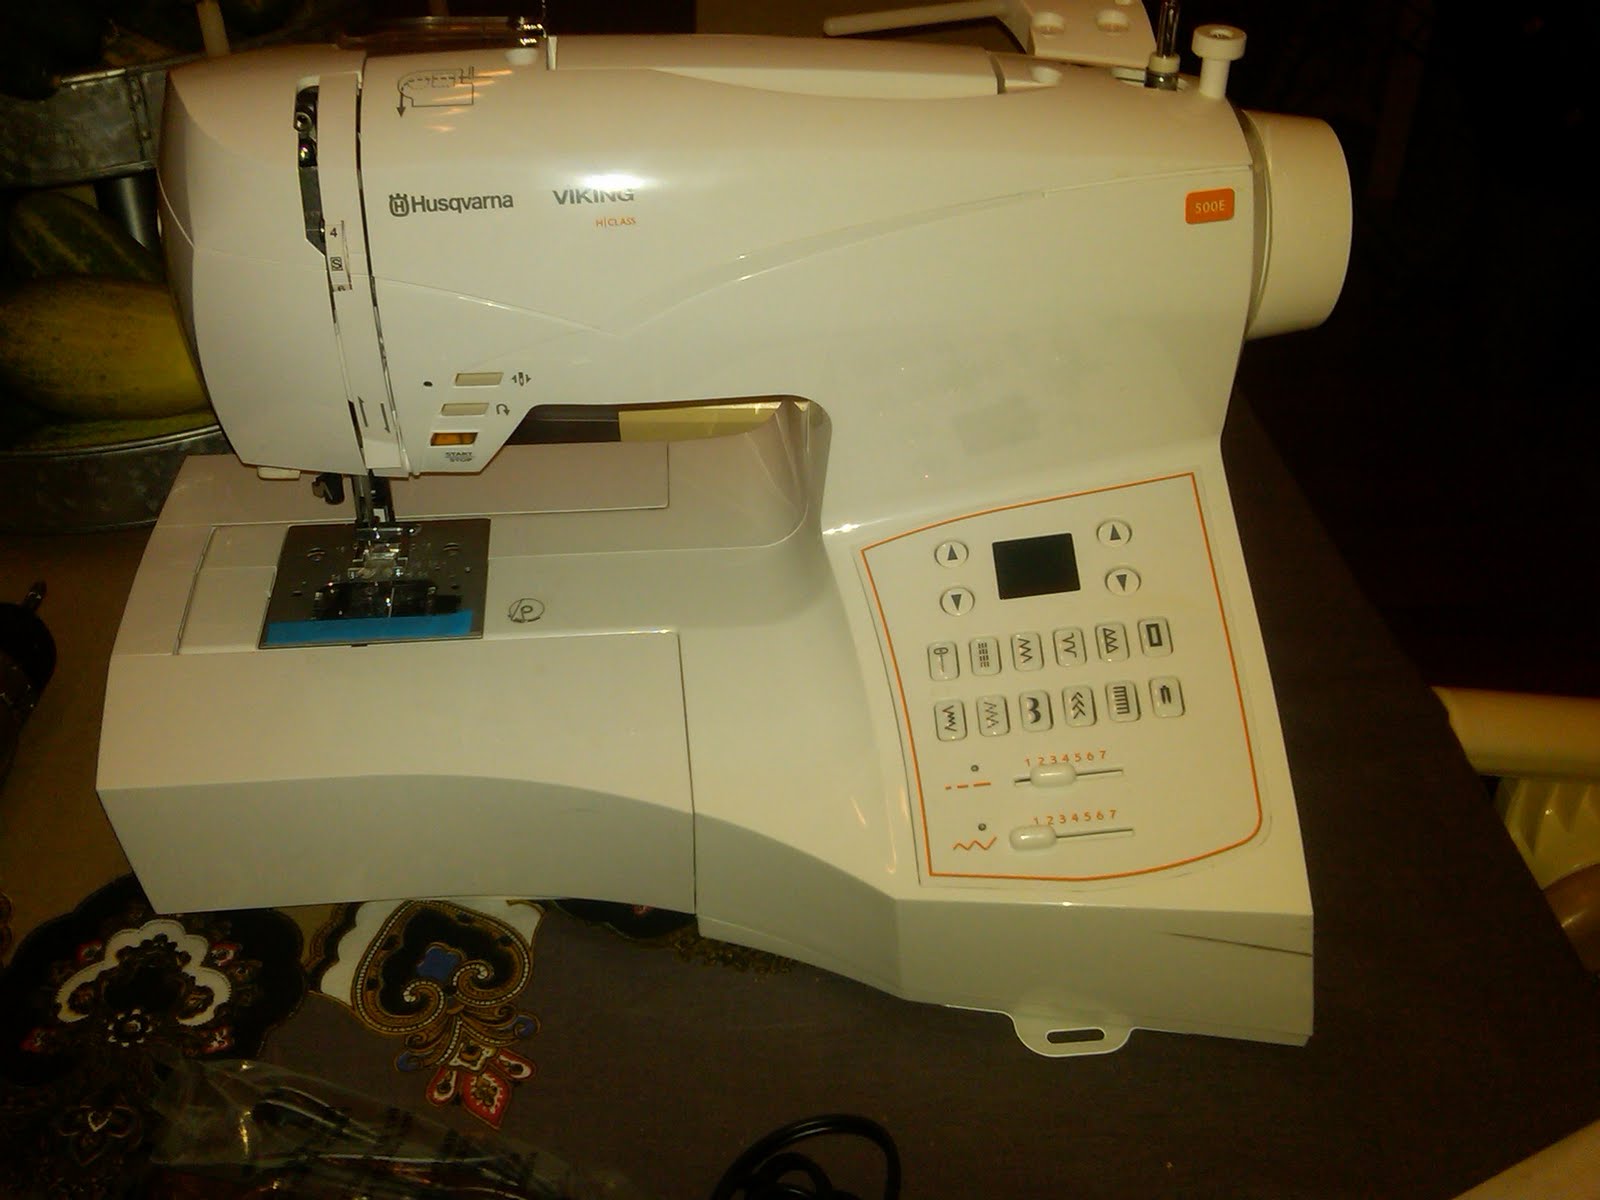
On February 20th, I posted my five goals for The Suburban Challenge. Number Three was to learn how to sew.  I also mentioned that I was going to have to wait until the summer to begin that challenge. I am envious of the talents that my friends Meredith MK, Erin CH, Kimberly HL, and Leslie WS all have at the helm of a machine. I told my sewing instructor that my first goal was to make a pillow case dress. Now, whether I stop at the pillow case dress or whether I forge ahead and tackle other items (skirts, curtains, pillows, etc...) is yet to be determined.

Step one - buy a sewing machine. CHECK  The Husqvarna 500E


The plan for tomorrow is to try and make it work. Then I have my first sewing lesson at Anderson Sew and So in Rockwell on Friday!

Sunday, July 3, 2011

Summer Must Read

I have become fascinated and infatuated with "The Fabulous Beekman Boys". My obsession first started when Williams Sonoma started carrying their heirloom vegetable seeds and their memoir.  Their memoir? Since when does William Sonoma carry novels?
"The Fabulous Beekman Boys" are two Manhattanites who bought a million dollar weekend home/mansion/farm in rural New York. Originally their journey began as only a weekend retreat and turned into a business. Their story is about risking it all to become gentlemen farmers.

Come to find out - one of the boys - Dr. Brent Ridge who was formally Martha Stewart's health and wellness expert for Martha Stewart Living Omnimedia - is from North Carolina. Dr. Brent is from Randleman, NC which is close to Ashboro. Also, in one of their episodes, the pair travels to North Carolina to pick up baby sheep from a "farm" for Martha Stewart and who meets them in the driveway other than Lynn Scott Safrit! (For those of you who don't know LSS is David Murdock's right hand woman here in Kannapolis for Castle and Cook.)

The memoir was written by Josh Kilmer-Purcell, the other half of the Beekman Duo. Josh is an ad executive in New York City and juggles farm life with the pressure of big city deals. I could not put this book down! It is farming and living the American Dream told through the perspective of a drag queen. Believe it or not, there is a lot I can relate to in this book; but not the walking on gold fish filled platform shoes at 4 am through New York City part. In the Epilogue, Josh pays tribute to his inspirations from Oprah and Martha by saying,

My only dream was to live the rest of my life at the farm, pickling, weeding, and mucking. It's what Oprah told me I should do, and what Martha inspired me to achieve. But they were wrong. Actually, they weren't wrong. I just heard them wrong. Martha isn't about achieving perfection - God knows she hasn't. It's about going back time after time trying to get there. It's about graciously, meticulously, fabulously hosting that last-chance New York Times reporter house guest even when all you want to do is lie on a fly-littered bed, read gossip magazines, and die. And Oprah's call to live your Best Life isn't as simple as it seems. Your Best Life isn't necessarily your favorite life or the one you selfishly want. It's simply the life you're best at.

This is a great read that will keep you motivated to weed, can, and cook all summer long.
The Bucolic Plague

Tuesday, June 21, 2011

Lemon Yellow Squash Pie

Need to get rid of your squash?

This recipe was featured in The Salisbury Post by Sue Davis about 3 years ago.  It was an instant smash with my husband and family.  (Unfortunately, the joke was on my uncle who hates squash and whom I tricked into eating and loving in front of everyone - Sorry Uncle Gray.) It fits perfectly into the Suburban Challenge because it is simple and freezes easily.  I made four.  I took one to a Father's Day get together last weekend and have frozen the other three for the next time I am "asked" to bring a dessert.

1 cup yellow squash grated in food processor
1 cup sugar
3 tablespoons all purpose flour
2 eggs
1/4 cup melted butter
2 teaspoons lemon juice
1 pie shell (I used the graham cracker ones)


Preheat oven to 350 degrees. Grate squash. Mix all ingredients together and put mixture into pie shell. Bake for 45 minutes on the oven's lowest rack.
I was only able to cook 2 at one time since that is all that would fit on my lowest rack.
My freezer is starting to look good!  You can see the three extra pies in the back, zucchini bread in the front, and a bag of muffins ready for next month.

Friday, June 17, 2011

Canning 101

I can my own fruit jams and my own vegetables - big deal! I get a lot of weird looks when I tell people that, like their thinking, "That is so old school,"  or "I would never have the time or the patience for that,"  or even, "I'm scared to do that."

I got into gardening three years ago inspired by my grandparents' successes. Realizing how much more I could do if I could preserve some of this food to last longer than the three weeks its harvest is fresh, two years ago I bought Canning & Preserving for Dummies, Karen Ward. Literally, canning for dummies because I didn't have the slightest clue how to can food.  Thoughts of botulism and salmonella danced in my head as I dreamed of creating cute little Christmas presents for the secretaries at work. However, I rationalized to myself that canning has been a survival skill for over 100 years. If farmers could do it in the 1800s without a class - so could I. Thus, I set out on a journey to self-educate moi-meme about canning.


I quickly learned that there were two types of canning: water bath and pressure.  After reading the chapter about pressure canning, I decided that I was going to start off small and just focus on water bath canning. Water bath canning is placing the jar into boiling water to seal the jar. Simple - yes. The canners with racks can be purchased at Walmart for $30-40. With this process, you can preserve anything that has acid - fruit, salsa, pickles, tomatoes, and relishes.  This was a great way to start small.  I had so much fun that first year that last year I decided to take the plunge and begin pressure canning as well. This canner is a bit more expensive than the water bath and much more technical $70-85.

Now, my sister-in-law who has an exploding garden wants to also preserve some of her cucumbers with pickling recipes.  I am walking her through the very easy process. I think that America is having a renewed interest in learning the art of canning - proof is in the canning aisle at Walmart. It is fun, safe, and even easier with today's modern-day techniques. Here are some tips:
1. My biggest piece of advice is - Don't buy a canner if you know someone who has one.  Borrow It!!!  Why add another piece of equipment to the house if you don't have to. If there are of two of you in a circle of friends who want to start canning but don't know of anyone who has a canner, split the cost and share it. You only use it for about four-five times in a harvest.
2. Think of all of the cute, cheap Christmas gifts you can start creating.  Make cute little labels that say "From the Kitchen of Jane Doe 2011," and you have got yourself the best teacher, secretary, neighbor, step aunt, mailman, preacher, hair dresser, or swim coach gift ever.
I so don't have room in my kitchen for all of the extra cans, so I found room in my front living room to store them.  Magazine, picture frame, candle, ...... green beans?

Tuesday, June 14, 2011

Healthful Squash Breakfast Muffin

Similar to my issue with Zucchini, all of my yellow squash wants to harvest at the same time. And, as with zucchini, there are wonderful ways to eat it fresh.  My favorite is grilled with a little balsamic vinegar and olive oil - or the casserole Kimberly made on memorial day from Southern Living.  (It had BACON!)

I set out on a mission to create a healthier breakfast muffin involving the yellow squash. I researched other healthy breakfast muffins as well as squash dishes to maximize the yellow boy's flavor. It took me three attempts - but I nailed it! (At least I think it is good for having no white sugar or oil.) Enjoy!

Healthful Squash Breakfast Muffin
1 medium yellow squash grated
1 egg
1/2 cup applesauce
1/4 cup non fat vanilla or plain yogurt
2 tablespoons honey
1/2 cup brown sugar
the juice and zest from one lemon
1 1/4 cups all purpose flour
1 cup old fashioned oats
1 tablespoon flax seed
1 tablespoon wheat germ
1 teaspoon baking powder
1/2 teaspoon baking soda
1 teaspoon poppy seeds.

Preheat oven to 400 degrees.  Mix together the egg, applesauce, yogurt, honey, brown sugar, lemon zest, and lemon juice.  Add the grated squash. In a separate bowl, combine the flour, oats, flax seed, wheat germ, baking powder, baking soda, and poppy seeds. Stir in the applesauce mixture into the flour mixture. The mix will be lumpy. Pour batter into a greased muffin pan or liners. Bake for 20-25 minutes until the top edges start to brown. Makes 12 muffins. Can be frozen.

Monday, June 13, 2011

Reader Recipes

Some of you have sent me your awesome recipes in response to my previous posts.

Maureen, my dear friend in Richmond, VA and former roommate, sent me her breakfast casserole recipe. This recipe, similar to "Clean the fridge out Frittata" is flexible enough to use with whatever you currently have in the fridge that is getting ready to go bad:

"So I have been making this breakfast casserole for the last month and I thought you might like it for your blog. Which by the way love it.   I started doing it to make things easier during the week when it came to packing lunches so I didn't have to think about what I was going to eat for breakfast.  It's easy and I can heat it up in the microwave at work. 
 
Egg casserole: 
choice of meat
choice of veggies
8-10 eggs beaten
cheese (if desired)
 
Cook the meat (bacon and/or sausage). Once cooked, place in casserole dish crumbled.  Saute veggies (this week was left over peppers that weren't used in salads, onions and mushrooms). Once soft place in dish, then pour eggs and cheese if using over the mixture and bake at 350 for 45-60 mins until firm.  Cool, cut into serving sizes and put in fridge.  It's quick easy and we eat it all week. One less thing I have to think about during the week... "
 
Here is Maureen and her daughter Liliana at the Kannapolis park when they visited in January.
 
My cousin Becky King just had a baby one week ago today and has still found time to email me her wonderful zucchini recipes:
 
"I have 2 zucchini recipes  that I wanted to share with you.
 
Zucchini strips:
Cut zucchini into strips
blanch it (boil for 5 minutes)
Place on baking sheet and drizzle with olive oil, then sprinkle parm cheese.  Can also add some garlic powder or salt.
Boil low till browned.
 
Zucchini casserole:
Cut zucchini into round pieces (like a cucumber slice)
In casserole dish add layer of zucchini, then place a spaghetti sauce (I use hunts) on top of the zucchini.  I think place a layer of mozzarella cheese. and repeat for another layer (zucchini, sauce, moz cheese). Bake on 350 for about 25-35 minutes."
Introducing the newest member of our family: Avery McCall King.  We love you already!!

Wednesday, June 8, 2011

Summer Meatball

Sneaking in zucchini, this kid friendly recipe is also healthy.
It is easy to make all four batches at once so that you can prepare dinner and freeze three batches for later. For each batch of meatballs you will need:

1 pound of ground turkey
1 egg
2 tablespoons mayo
1/3  cup bread crumbs
1 tablespoons fresh chopped basil
1 teaspoon salt
1/2 teaspoon pepper
1 tablespoon balsamic vinegar
1 cup of grated zucchini (for all four batches you will need about 3 medium zucchini)

Preheat the oven to 350 degrees.
Mix all ingredients together.
Place a cooling rack on top of a rimmed cookie sheet. Form one inch meatballs and place them onto the cooling rack. This allows the grease to drip through the meatball and keep it crisp while baking.

Bake for 35-40 minutes until the tops are brown and hard.
Using a fork, lift the meatball off the cooling rack and place into a freezer safe container till ready to eat.

The meatballs will have cooked and formed to the rack and will leave lines. However, cooking them this way allows you to cook an entire batch at one time without using a lot of oil and smoking up the kitchen.

To serve: Thaw if frozen. Place meatballs into a large fry pan with a jar of marinara of your choice. Reheat over medium heat for 15 minutes or when sauce begins to bubble.  Serve over pasta.

Sunday, June 5, 2011

Zucchini

When it rains it pours!!


I love to plant zucchini every year.  It is easy to grow and produces a lot. However, its just my luck that it is all ready at one time.  There are tons of great recipes out there for eating zucchini fresh - however, it is a little more difficult to think in terms of The Suburban Challenge and making the zucchini last much longer. Here are three of my favorite ways of transfer zucchini from plant to freezer so that I can continue to enjoy it for months longer.


1. Zucchini Bread.  Make extra batches and freeze them for the holidays, house warming gifts, or when a friend has a new baby you can take over a breakfast dish for sleep deprived mom and dad.  I like hosting friends every year at Christmas for a holiday brunch. As with last year, I will already have one dish made and ready to thaw - the zucchini bread.  Paula Deen's recipe is my favorite:
http://www.foodnetwork.com/recipes/paula-deen/zucchini-bread-recipe/index.html

2.  Meatballs.  While grating the zucchini for the zucchini bread, I also grate some to incorporate into a summer meatball that freezes well.  Recipe to follow!

3. Baby Food.  Peal, steam, puree, then add liquid (breast milk, formula, or water) to create a creamy consistency.  Freeze in ice cube trays. Last week I made a vegetable blend of zucchini, broccoli, and green peas all from the garden. Cam loves it!

Friday, June 3, 2011

3 Ways to Save Money in June

Here are this months ways to save money:

1. Spoon yogurt into single-serve dishes. Everyday I pack a individual yogurt and applesauce in my lunch for work. I have done this for two years. I recently realized how much extra money I am spending that is not necessary. A carton of four yogurts at Aldi is $1.86. Or, the average individual yogurt is $.75.  However, if you buy the large, 2 lb container, it is $1.26.  Last week I purchased the large container and portioned the yogurt out into recycled baby food jars and got six servings out of my $1.26, and it took me less than five minutes. Well, this rule applies to my applesauce as well.  So, if my calculations are correct, and I continue buying the larger jars, I will have an extra $100 to spend at Christmas (as well as creating less waste for the environment).

2. Washing Lettuce. Too tired to rinse your own lettuce so you end up buying the pre-rinsed, chopped bag lettuce in the produce? The red leafy kind is $1.99 per pound if you bag it yourself and wash and chop at home, or $4.33 per pound if you toss a pre-washed bag in the cart. If you can wash a pound in five minutes, give yourself credit for making $30 per hour.

3. Peeling carrots. Baby carrots are cute, but at $2.65 a pound, they'd better be.  Peel regular carrots that cost 88 cents per pound in 5 minutes, and you made $53 per hour.